쌓고 쌓다
[스프링 부트] 게시글 삭제 - 5 본문
PosterRepository
public interface PosterRepository {

    ...

    void deleteById(Long id);
}
PosterRepository 인터페이스에
게시글의 PK인 id를 넘겨 받는 deleteById 추상 메소드를 작성한다.
JpaPosterRepository
@Repository
public class JpaPosterRepository implements PosterRepository{

    private final EntityManager em;

    ...

    @Override
    public void deleteById(Long id) {
        Poster poster = em.find(Poster.class, id);
        em.remove(poster);
    }
}
PosterRepository 인터페이스를 상속 받아 구현하는 JpaPosterRepository에
해당 추상 메소드를 구현한다.
이때, EntityManager의 find 메소드를 통해 DB에서 찾을 수 있다.
그리고 이 데이터를 remove 메소드를 통해 객체를 넘겨주면 DB에서 삭제가 이뤄진다.
차차 JPA에 대해 깊게 공부하자...ㅠ,ㅠ
@Service
@Transactional
public class PosterService {
    private PosterRepository posterRepository;

    @Autowired
    public PosterService(PosterRepository posterRepository) {
        this.posterRepository = posterRepository;
    }

    ...

    public void deletePoster(Long id) {
        posterRepository.deleteById(id);
    }
}
PosterService에서 게시글의 삭제 메소드 deletePoster를 추가한다.
이 메소드에서 posterRepository의 deleteById 메소드 실행이 이뤄진다.
PosterController
@Controller
public class PosterController {

    private final PosterService posterService;

    ...

    @GetMapping("/poster/delete")
    public String delete(@RequestParam(value="id") Long id) {
        posterService.deletePoster(id);
        return "redirect:/posters";
    }

}
PosterController에 "/poster/delete"를 GET 메소드를 매핑한다.
이때 삭제할 게시글의 id를 전달 받고, posterService를 통해 게시글 삭제가 이뤄진다.
"redirect:/postres"를 통해 게시글 전체 보기로 리다이렉션을 했다.
posterView.html
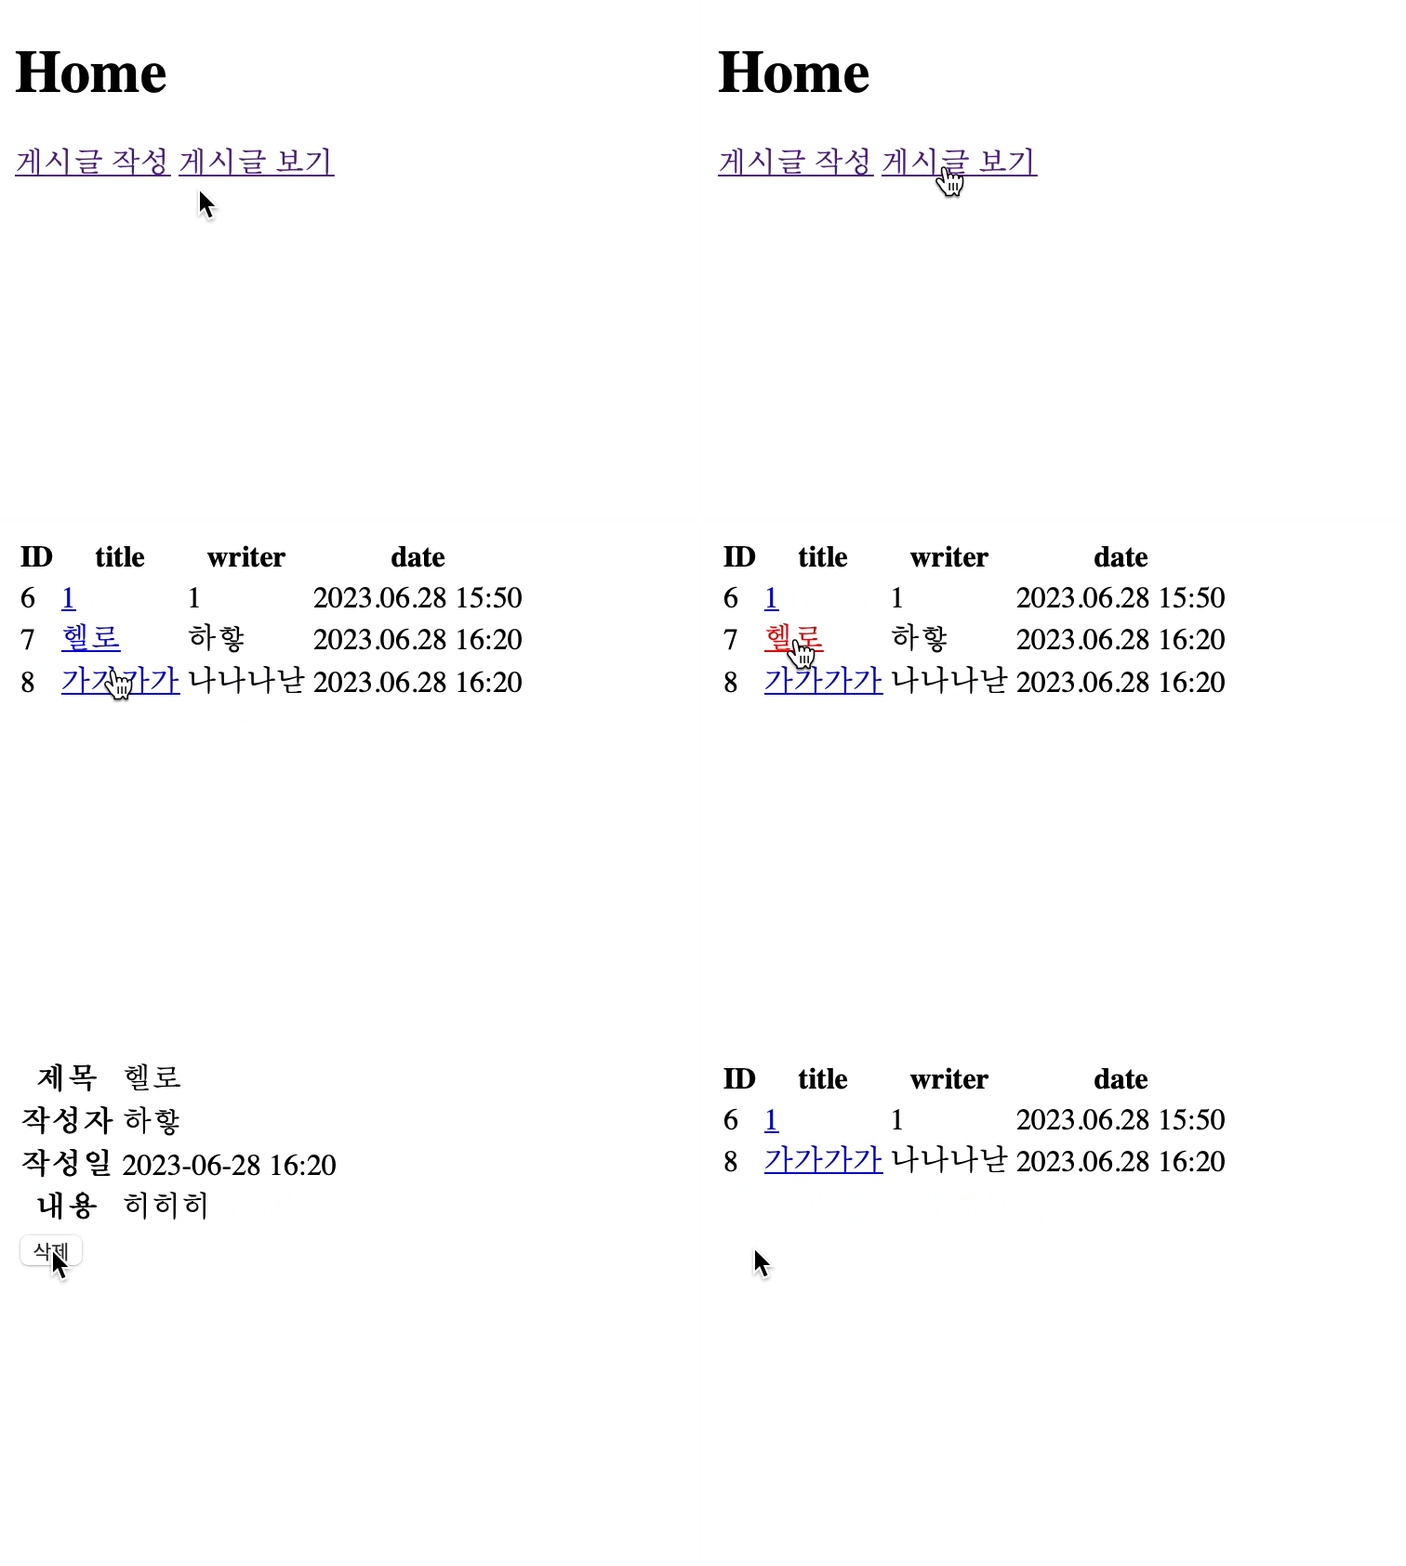
<button type="button" th:onclick="|location.href='@{/poster/delete(id=${poster.id})}'|">삭제</button>게시글 상세보기인 posterView에 삭제 버튼을 추가했다.
onClick?
원래 버튼 태그의 링크 이동 속성 onclick의 사용은 아래와 같다.
<!-- 현재창 열기 -->
<button type="button" onclick="location.href='주소'">버튼</button>
타임리프 리터럴?
타임리프에서 문자와 표현식이 존재하기에
리터럴 대체인 | | 안에 작성하면 된다.
"|Hello ${user.name}|"
user의 이름에 따라 Hello한다.
리터럴 없이 사용한다면 아래와 같이 작성해야한다.
" 'Hello' + ${user.name} "
타임리프 링크식 @{}
타임리프의 링크식은 @{} 형태이다.
이전의 게시글에서 사용했었다.
https://non-stop.tistory.com/471
[스프링 부트] 게시글 상세보기 with @RequestParam - 4
posterList.html ID title writer date 게시글 전체 출력 시 게시글 제목에 링크를 이용해 상세 보기 페이지를 요청한다. "/poster/read?id=1" 형식으로 PK를 이용해 원하는 게시글을 지정하여 GET 요청을 보낸다.
non-stop.tistory.com
결과

'프로그래밍 > spring' 카테고리의 다른 글
| [스프링 부트] 게시글 수정 - 7 (2) | 2023.07.01 |
|---|---|
| [스프링 부트] 게시글 작성 유효성 검사 및 폼 데이터 유지 - 6 (0) | 2023.06.30 |
| [스프링 부트] 게시글 상세보기 with @RequestParam - 4 (0) | 2023.06.27 |
| Thymeleaf(타임리프) LocalDateTime 출력 및 작성일 만들기 - 3 (0) | 2023.06.25 |
| [스프링 부트] MySQL 연결 및 JPA - 2 (0) | 2023.06.24 |


