
쌓고 쌓다
[스프링 부트] 게시글 댓글 작성 - 9 본문
댓글(Comment) 테이블 생성
CREATE TABLE comment (
    id bigint NOT NULL auto_increment,
    pno bigint NOT NULL,
    writer VARCHAR(100) NOT NULL,
    content VARCHAR(300) NOT NULL,
    regdate DATETIME NOT NULL,
    PRIMARY KEY(id),
    FOREIGN KEY(pno) REFERENCES poster(id)
);
댓글이 포함되는 게시글의 PK를 외래키 pno로 가진다.
댓글(Comment) 클래스 생성
@Entity
public class Comment {

    @Id @GeneratedValue(strategy = GenerationType.IDENTITY)
    private Long id;

    private Long pno;
    private String writer;

    private String content;

    @Column(name="regdate")
    private LocalDateTime regDate;
}
사용하지는 않았으나 @Table(name="reply")와 같이 매핑할 테이블 이름을 지정할 수 있다.
@GeneratedValue : 엔티티 기본 키 생성 전략으로 IDENTITY는 키본 키 생성을 DB에 위임하는 것이다.(AUTO_INCREMENT)
@Column : 필드명과 다른 테이블 컬럼과 매핑할때 필요하다.
+ regDate 컬럼을 regdate로 매핑 시켜주지 않으면 조회 SQL시 reg_date로 컬럼 조회가 이뤄져 컬럼 일치하지 않음.

CommentRepository
public interface SpringDataJpaCommentRepository extends JpaRepository<Comment, Long> {
    List<Comment> findByPno(Long pno);
}
SpringDataJpa에서 제공하는 findBy 방법으로 컬럼을 통해 조회할 수 있다.
나중에 게시글에 맞는 댓글들을 뽑아오기위해 댓글의 외래키 pno를 통해 찾도록 메소드를 작성했다.
CommentService
@Service
@Transactional
public class CommentService {

    private SpringDataJpaCommentRepository commentRepository;

    @Autowired
    public CommentService(SpringDataJpaCommentRepository commentRepository) {
        this.commentRepository = commentRepository;
    }

    public Long write(Comment comment) {
        comment.setRegDate(LocalDateTime.now());
        commentRepository.save(comment);
        return comment.getId();
    }

    public List<Comment> findComments(Long pno) {
        List<Comment> comments = commentRepository.findByPno(pno);
        return comments;
    }


}
게시글 작성때와 동일한 방식으로 작성했다.
추후에 Controller에서 해당 게시글에 포함된 댓글을 조회하기위한
findComments 메소드를 작성했다. 이 메소드는 commentRepository의 findByPno를 사용한다.
CommentController
@Controller
public class CommentController {

    private final CommentService commentService;
    @Autowired
    public CommentController(CommentService commentService) {
        this.commentService = commentService;
    }

    @PostMapping("/comment/write")
    public String commentWrite(Comment comment) {
        commentService.write(comment);
        return "redirect:/poster/read?id=" + comment.getPno();
    }

}
게시글 상세보기 페이지에서 form 태그를 통해 "/comment/write"로 POST 요청을 보낼 것이다.
이때 넘어오는 댓글을 CommentService를 통해 Repository에 넣는다.
그리고 해당 게시글 상세보기 페이지로 리다이렉션한다.
PosterController
@Controller
public class PosterController {

    private final PosterService posterService;
    private final CommentService commentService;

    @Autowired
    public PosterController(PosterService posterService, CommentService commentService) {
        this.posterService = posterService;
        this.commentService = commentService;
    }

    @GetMapping("/poster/read")
    public String read(Model model,@RequestParam(name = "id") Long id) {
        ...

        List<Comment> comments = commentService.findComments(id); // 추가 작성
        model.addAttribute("comments", comments); // 추가 작성
        return "posters/posterView";
    }

}
게시글 상세보기 요청시 해당 게시글의 댓글들을 조회하여 함께 넘겨주는 코드를 추가 작성한다.
이때 CommentService가 필요하므로 Poster,Comment 서비스를 같이 DI를 해준다.
posterView.html (게시글 상세보기)
(1) 댓글 작성
<div>
<form action="/comment/write" method="post">
<div>
<input type="text" name="writer"> <br>
<input type="hidden" name="pno" th:value="${poster.id}">
<textarea type="text" name="content"></textarea>
</div>
<div>
<button type="submit">제출</button>
</div>
</form>
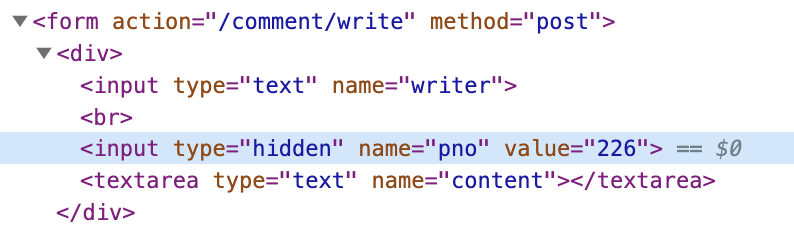
</div>댓글 작성시 해당 댓글이 포함되는 게시글의 고유 번호(PK)는 어떻게 전달하는가?
input 태그의 타입을 "hidden"으로하면 사용자에게 보이지 않는 입력 필드를 만들 수 있다.
이때 게시글의 PK를 댓글의 pno로 넣어 보내준다.
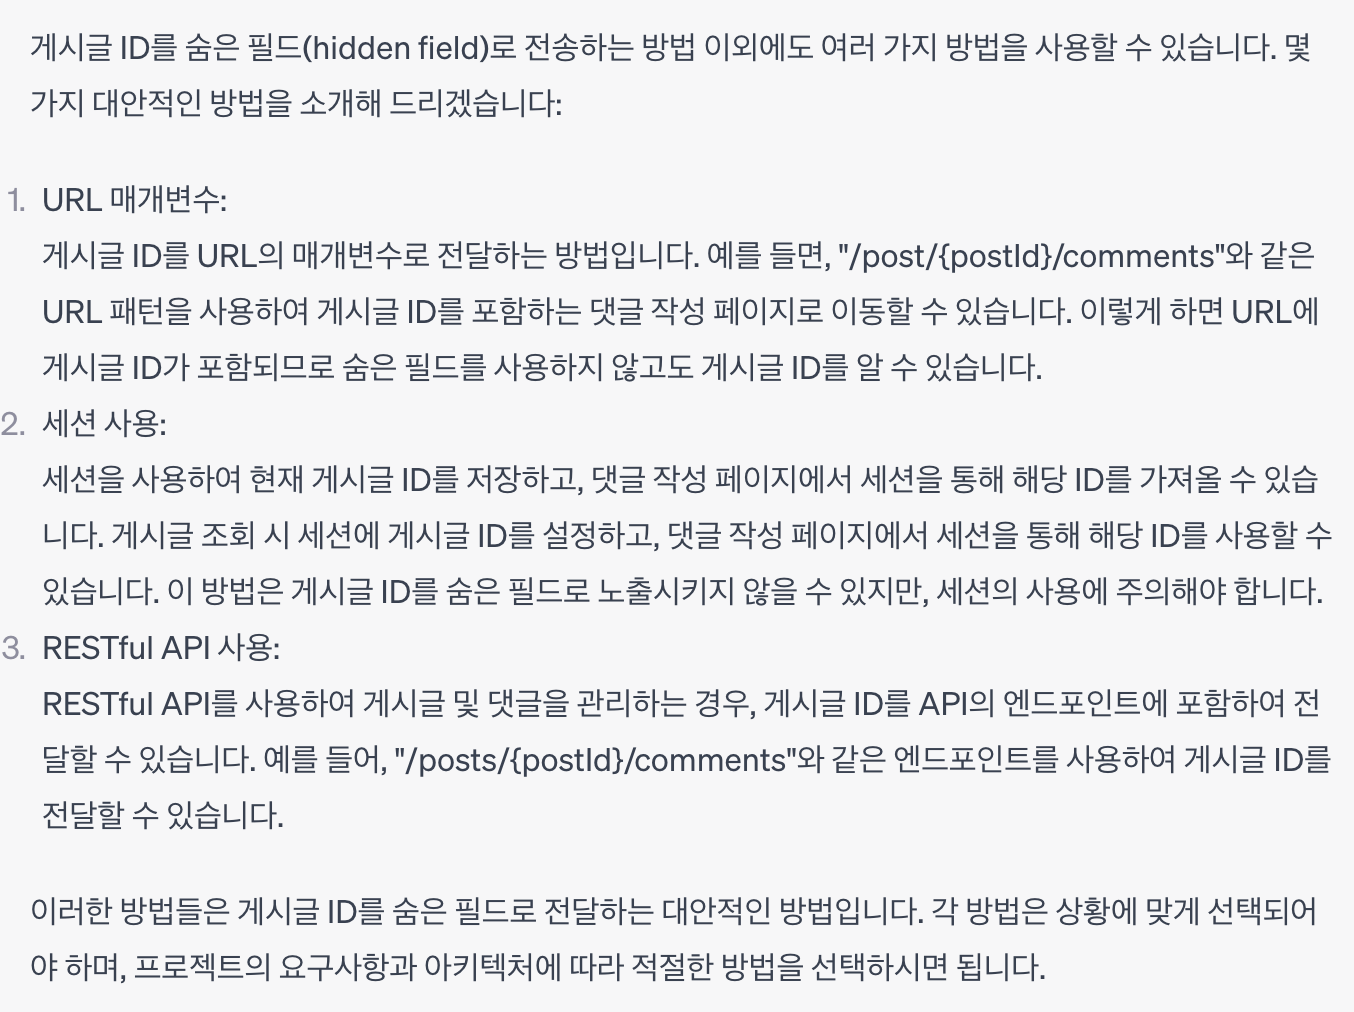
hidden 방법말고 어떤 방법으로 게시글 PK를 넘길 수 있는지 ChatGPT에게 물어봤다.
(2) 댓글 조회
    <div>
        <ul th:each="comment : ${comments}">
            <li th:text="|${comment.writer} ${comment.content}|">
            </li>
        </ul>
    </div>
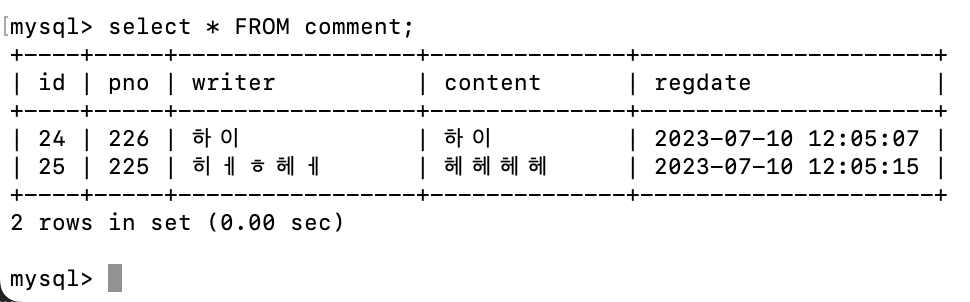
댓글 구현 결과
'프로그래밍 > spring' 카테고리의 다른 글
| @Configuration, 싱글톤 방식의 주의점 (1) | 2023.07.12 |
|---|---|
| 싱글톤 패턴, 싱글톤 컨테이너(스프링 컨테이너) (0) | 2023.07.10 |
| 스프링 빈 조회 - 동일 타입, 상속 관계 (0) | 2023.07.09 |
| 스프링 컨테이너, 스프링 빈 조회 (0) | 2023.07.08 |
| IoC, DI, 컨테이너 (0) | 2023.07.07 |


